Category: Home Improvement

How to Find the Best Kitchen Remodelers

Kitchen Remodel

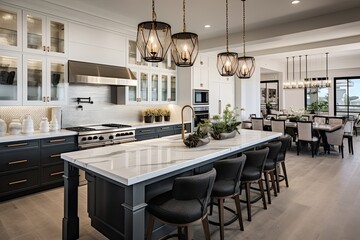
The kitchen is the heart of a home and often one of its most significant selling points. Kitchen remodeling is an opportunity to create a space that truly belongs to you.Kitchen Remodel

Remodeling pros generally divide kitchen redos into minor and major categories, with cosmetic refreshes falling under the little category, while layout changes and construction kick a project into the significant tier. Full-scale renovations can take months or even longer to complete. Contact Kitchen Remodelers Atlanta for professional help.

A professional kitchen renovation is a significant investment in both your home and lifestyle. It is essential to hire a kitchen remodeler who has a license and insurance coverage. The best way to find out whether a remodeler is licensed and insured is to ask for proof of liability and workers’ compensation insurance. You can also check with your state’s licensing board to see if their license is in good standing. Additionally, you can look for membership in a national kitchen and bathroom or remodeling contractor association to confirm their credentials.

Whether you’re interested in a minor refresh or a major transformation, it is important to set your goals for the project and share them with your remodeler. This will help you understand the scope of work that will be needed and ensure that the project stays within your budget. Your kitchen remodeler should be able to provide you with an accurate estimate for the cost of the project, as well as any potential changes or additions that may be required during construction.

It’s crucial to understand the difference between renovating and remodeling a kitchen, or any space. Renovating involves changing the interior finishes, such as repainting or installing new flooring. A full kitchen remodel, on the other hand, will transform the layout of the room. This could include tearing down walls, moving plumbing fixtures, and updating electrical systems. A full kitchen remodel is usually more expensive than a renovation, but it can increase your home’s value and provide you with an amazing new living space.

The length of time it takes for a kitchen remodel will vary depending on the scope of the project. A cosmetic refresh, such as repainting and installing new flooring or fixtures, typically takes 2-4 weeks. A standard renovation, including replacing cabinets, resurfacing countertops, and upgrading appliances, can take up to 6-8 weeks. A complete kitchen remodel, which involves layout changes, rewiring, plumbing and electrical work, custom cabinetry, and luxury fixtures, can take up to a few months or longer.

Experienced & Reputable

A kitchen remodel can be a huge undertaking, so it’s important to find a contractor with extensive experience in the industry. Not only will this ensure a high-quality outcome, but it will also save you time and money in the long run. A seasoned kitchen remodeling company will know how to navigate the process from start to finish, and they’ll be able to provide you with a realistic timeline for the project so that you can plan accordingly.

The best way to determine a potential kitchen remodeling contractor’s level of experience is by looking at their portfolio. Ask for photographs of past projects and, if possible, visit the homes to get an idea of their craftsmanship and attention to detail. Additionally, ask the contractors about their favorite kitchen materials and how they balance affordability with quality. This will give you a sense of their design aesthetic and how they might approach your project.

While most homeowners have a general idea of what their dream kitchen looks like, a professional design consultant can help them nail down their vision. Typically found in kitchen and bath showrooms, these experts can use 3D software to show homeowners what their finished product will look like, which helps them make the right decisions during the remodel process. They can also assist with sourcing and selecting products, such as custom textured flooring, acrylic wall cabinets, and PentalQuartz countertops.

When hiring a kitchen remodeling contractor, it’s important to make sure that they have adequate insurance coverage in case of any accidents or injuries during the course of the work. Moreover, it’s important to verify that the team has obtained all required permits for the project. Having this information upfront will prevent any complications down the line and avoid costly fines and delays.

With over a decade of experience, Paula McDonald Design Build specializes in elegant and understated kitchen and full-home interior remodels. Their work has been featured on the CBS and Netflix shows “Queer Eye,” and “Rachael Ray.” The firm’s Flatiron showroom features fully operable kitchens, allowing clients to get a feel for the latest American and European appliances and finishes.

Timely & On-Time

Your kitchen is the heart of your home. It’s also one of the most important rooms in terms of increasing your property value, which is why it’s often a top priority when remodeling your house.

A kitchen remodel is a big project. And when it comes to completing the project on time and on budget, there are a few things you need to keep in mind. First, you need to have a solid schedule in place. It’s important to have a clear plan for when each task will be completed and by whom. This will help ensure that the entire project is finished on time and that no unforeseen issues arise.

Depending on the scope of your project, kitchen remodels can range from cosmetic refreshes to complete renovations. For example, a basic cosmetic refresh may take 2-4 weeks to complete, while a full-scale renovation with layout changes, plumbing relocation, electrical rewiring and custom cabinetry could take 3-6 months.

It’s important to distinguish between the two, as renovating and remodeling have different meanings. Renovating refers to updating a space for better aesthetics or functionality without changing the structure of your home, while remodeling encompasses projects that restructure the property, like adding a sunroom or expanding an existing kitchen.

Affordable

The kitchen is the heart of any home, where meals are prepared and shared. It is important that your kitchen reflects your personal style and is functional for the family. If you are looking to improve your kitchen, it is best to go with a professional kitchen remodeler that will give you the most value for your money. This is why it is essential to do your homework and compare quotes from multiple companies. Once you narrow down your selection, be sure to ask for referrals, check their Better Business Bureau (BBB) rating, online customer reviews and license and insurance information.

The average cost of a kitchen remodel can vary between a minor refresh and a major overhaul, depending on the extent of work. A full-bore renovation that rejiggers the floor plan, changes plumbing fixtures and even tears down walls falls into the “major” category, according to pros. And it is often more expensive because it takes longer and may require alternate cooking arrangements while the project runs its course.

A kitchen remodel can add both aesthetic and financial value to your home, and the benefits will last as long as you own your property. For instance, new appliances will typically be more energy-efficient and can save you money on your utility bills. And replacing outdated cabinetry with a more updated design and quality materials will boost your kitchen’s overall functionality.

Another kitchen remodel benefit is the added storage. Removing old cabinets and adding shelving or a new pantry will give you room to store all your cookbooks, jars of pickles and other kitchen knick-knacks. It is also important to note that remodeling your kitchen can also bring it up to current building codes and safety standards, such as the addition of circuit interrupter outlets.

The most expensive part of a kitchen remodel is the cabinetry, which accounts for 29 percent of the total cost of the remodel. This is largely due to the fact that homeowners want the latest styles and finishes for their cabinetry, as well as better organization and storage features. Luckily, there are many ways to save on your cabinetry costs, including choosing pre-made stock cabinets rather than custom options.

Essential Elements of Kitchen Remodeling

Richmond Va Kitchen Remodeling is a big investment, so creating a budget is wise before starting. Pin inspiration from home improvement websites and consider talking to lighting, tile, and appliance store professionals for advice on what can be done within your budget.

Choose timeless designs and materials to hold up over time. Avoid over-customizing, which may limit your future home-buying audience.

Cabinets are one of any kitchen’s most important and most used elements. They offer storage and functional workspace but can also add style to the kitchen design. There are many different cabinets to choose from, and they can be repurposed in several ways. For example, old cabinets can be transformed into open shelving to display cookbooks and dishes. Or, they can be painted or stained to match the rest of the kitchen and add a pop of color.

Base cabinets are generally installed after the wall and floor surfaces are finished but before countertops and appliances are brought in. They are anchored to the subfloor or wall studs and are typically shimmed to ensure they are level.

Slab or flat-front cabinets are the most basic cabinet style and can be spiced up with a unique paint or stain color or by adding details such as oversized handles. They are easy to clean and look great in a minimalist kitchen design.

Countertops are one of the most demanding elements of a kitchen. The surface must be tough, durable (stain-proof and impact-resistant), and aesthetically appealing. Often, the choice of countertop material is driven by the design and lifestyle goals of the homeowners and what best complements the cabinetry and floors.

Granite is a popular option for countertops because it is both heat and stain-resistant and comes in various colors and visual textures. It must be sealed regularly.

Laminate is an inexpensive countertop option that’s easy for DIYers to install. Newer porcelain types offer diverse designs that mimic natural wood, real stone, and more. Tile is another good option that’s inexpensive, durable, and available in various patterns and colors. However, grout seams can crack and stain easily, requiring regular replacement.

Stainless steel countertops are another option. These are made on-site by forming a platform and cutting to field dimensions using a precise machine, usually located at the installer’s shop. The edges are rounded or ogee-shaped, and the finish may include an inlay.

Flooring is an essential component of a kitchen remodel, whether you are installing a new design or upgrading to a better material. It must be durable enough to stand up to traffic and spills, comfortable for long periods, and beautiful.

Tile is a popular option, with many choices in different colors, shapes, and sizes. Some types are designed to look like natural materials, such as stone, wood, or marble, while others can be highly patterned and modern. Cement tiles are another option, as they are highly textured and waterproof when glazed.

If you’re looking for something more unique, consider travertine tiles. This sedimentary rock is often used in bathrooms, but it’s also becoming a common choice for kitchen floors. Travertine is a neutral color that can be mixed with other hues or accentuated by patterns. It is available in muted tan tones and bold purple, orange, or red ribbons. Its organic beauty is sure to add a dramatic touch to your kitchen.

Lighting is an essential element of any kitchen remodel project. It can create the room’s ambiance, set the mood, and improve visibility for food preparation. There are several different types of light fixtures, each offering unique advantages. Choosing the right color temperature, wattage, and fixture placement is important in creating the desired ambiance while keeping a well-lit space.

A popular kitchen remodel idea is to add under-cabinet lighting. This can be in the form of all-in-one linear fixtures, modular pucks, or strip lights that can be connected in a process called daisy chaining. They can be hardwired to a switch or dimmer, plugged into an outlet, or powered by batteries.

Another great kitchen remodel idea is to light up your workspaces with task lighting. This can be done with recessed lights or pendants placed over sinks, standalone chopping stations, and dining areas. Avoid putting these lights directly above appliances, as this can create glare and be distracting when cooking.

Appliances greatly impact the layout and functionality of a kitchen, as well as how it looks. The refrigerator keeps perishables fresh, the microwave reheats leftovers, and the dishwasher cleans dishes and utensils.

Choosing new appliances with a style that matches performance is an important part of kitchen remodeling. Stainless steel finishes are popular, but you can find options that fit any taste or budget. Energy-efficient models reduce utility bills and help the environment by using less electricity.

If you plan on keeping your current appliances, store them in a garage or other room during the remodel so they don’t get damaged. Be sure to talk to your local appliance repair guy before making final decisions! Many high-end appliances come with warranties that include cosmetic repairs as well. These warranties can save you a lot of money in the long run. It’s also a good idea to choose panel-ready appliances to add a custom font to match your cabinetry. This gives you a timeless look that will stay in style quickly.

A kitchen remodel involves a lot of electrical work. It can include rewiring the entire space, adding or moving outlets and switches, and upgrading your breaker box to handle the added electrical load. If your old wiring can’t keep up, you risk having circuit breakers that frequently trip, or worse, the house could be at risk of fire and electrocution.

You also need to add new electrical circuits for your new appliances. You need one for the stove, another for the refrigerator, and at least two additional circuits for outlets where you’ll be using small appliances. A professional electrician will ensure that all new appliances and lights are wired safely, ensuring compliance with all applicable safety standards.

By strategically placing fixtures, you can add lighting to elevate your kitchen’s aesthetic and increase functionality. You can also incorporate smart home technology to promote your cooking experience and boost household efficiency. For example, you can install a power strip on the countertop that hides cords and provides multiple charging ports for your electronic devices.

Kitchen remodeling often involves plumbing. This can be a simple upgrade to the sink, faucets, or appliances or can be more significant and require rerouting plumbing lines. It might also involve new gas lines for a stove or oven.

Regardless of the size or scope of your remodel, good plumbers will be required to ensure all the work is done properly and safely. A bad plumber can cause many problems that are expensive to fix.

Upgrading old iron-style pipes to modern plumbing like PVC is a great investment during a kitchen remodel. It’s an easy way to reduce water bills, improve the look of your home, and make rerouting future installations easier. In addition, it’s an opportunity to get rid of those rusty pipes that could leak into your walls and cause costly damage. Replacing these with new pipes can be more cost-effective than repairing or replacing fixtures and appliances later. This is especially true if you’re planning to sell your home in the future.

Many kitchen remodeling projects require structural modifications. This can include removing load-bearing walls to create an open floor plan, adding an extension, or expanding the ceiling height. This type of work requires the help of a qualified structural engineer to ensure the integrity of your home remains unaffected.

Depending on the extent of the remodel, it may also be necessary to obtain building permits or perform structural alterations, such as relocating plumbing lines and electrical outlets. Working with a contractor who understands the local permit process and can provide the proper documentation for each job is important.

When choosing a contractor, look for one specializing in kitchen remodeling and with an extensive portfolio of projects in your desired style. Ask for referrals from personal and business contacts, and search online review sites for customer reviews and certifications. A professional and knowledgeable kitchen remodeler can help you identify your pain points and vision for the new space and develop a timeline that will make it possible to accomplish your project goals.

The Importance Of Proper Cabinet Installation Techniques

cabinet installation

Cabinet installation is a complex task that can be time-consuming and frustrating. It is important to know how to properly install cabinets to avoid making mistakes that can cause problems down the line.

Before starting, take the time to mark studs and strike cabinet lines on the wall. Also, mark any ‘in the wall’ piping that you will not want to screw into. Contact Thompson & Boys LLC experts to save you time and money.

cabinet installationLayout

Cabinet installation requires a great deal of careful planning. The most important step of the process is “layout,” which refers to the fine-tuning process that ties together vertical and horizontal planes so that your cabinets can hang square, plumb, and level. During layout, you will mark protruding points on the wall and floor using a laser level, tape measure, and pencil. This is done to ensure that your cabinets will be installed on studs, which provide strength and support.

Start by marking a level reference line on the wall for the top of your base cabinets. This will usually be 34-1/2 inches high (or higher with the addition of a countertop). Next, find the highest point on the floor and mark it on the wall. You may need to use a ladder or stool to reach this spot.

Once you know where the top of your base cabinets will be, you can start measuring for the location of your upper cabinetry. Standard wall cabinets are 18 to 20 inches high, but you may want a different height based on your personal preferences or the size of appliances you plan to install in the room. If you’re installing upper cabinets that will meet your ceiling, mark a level line at 19.5 inches from the base cabinet layout line for the bottom of the uppers.

Before starting to install the cabinets, make sure you have the right tools and supplies for the job. A hammer, tape, and pencil are good to have on hand, as well as a ladder or stool for working at heights above ground. You should also have a stud finder to locate the studs in the wall and drill 2-inch screws into them.

You should also set up a ledger board or cabinet jack along the wall at the height where you’re installing your upper cabinets. This will help you keep the cabinetry stable while you’re shimming* it to get it perfectly level.

Once you have a ledger board or cabinet jack in place, set up the first upper cabinet and screw it to the wall. Using the stud marks you made earlier, line up the pilot holes on the back of the cabinet with the corresponding studs in the wall and drive 2-inch screws into them. Repeat this process for each of the upper cabinets until you’ve covered the entire wall.

Wall Studs

Before starting to install cabinets, it is important to check that the wall is stable and level. Using a 4-foot level, check different areas of the installation area and note any dips or angles that need to be shimmed. This ensures that the cabinets will be level and stable once installed.

Next, you will need to locate the wall studs. This can be done by using a stud finder or simply knocking on the wall with your knuckles to listen for differences in sound. The studs will make a much deeper sound than the drywall. Once the studs are located, mark their locations with a pencil on the wall. It is essential to have at least one stud in every cabinet location to ensure the cabinets are secured and will not fall over time.

Once the studs have been located, a ledger board or cleat should be installed to support the cabinets and ensure that they are secure. The cleat or ledger board should be attached to the studs with 2-inch screws. Once the cleat or ledger board is in place, the cabinets can then be mounted to it.

It is also a good idea to add a bead of liquid nails to the plywood panels that are going to be screwed to the wall to help prevent them from pulling away from the studs over time. If you are mounting heavy or tall cabinets, I would suggest adding additional support to the walls in the form of a horizontal metal plate (similar to a stiffener) for extra stability.

If you are installing a combination of upper and lower cabinets, I recommend that you start with the lower cabinets and install them first. This will keep them out of the way and allow you to double-check that your layout is working before you move on to the uppers.

Then, when it comes to installing the upper cabinets, I recommend that you use a stud finder to locate the studs. Once the studs are located, carefully mark them with a pencil on the wall and use a carpenter’s level to ensure that the lines you have drawn on the wall are level.

Clamping

Cabinets need to be properly clamped so they can be securely attached to the wall. Incorrectly clamping cabinets can result in them shifting or falling off of the wall, which is not a good thing! It’s important to know which type of clamp you need and how much pressure to apply. Too little won’t keep the pieces firmly in place, and too much can damage them by leaving marks on the wood.

The best kind of clamp for cabinet face frames is a C-clamp. These are sturdy enough to hold the entire face frame, but they don’t have as much flex as a standard hand screw clamp which could leave marks on your work.

After the face frame is tightly clamped, a level should be used to draw a straight line on the wall at the height where both upper and lower cabinet runs will meet (for example, next to the stove). This is important because it ensures that the cabinets are the same height throughout the room and will be able to support the weight of your countertops when installed.

Once the line is drawn, use a stud finder to locate and mark the studs underneath that location. Then, attach a 1×3 cleat or ledger board to the studs beneath that line and drive 2-inch screws through it. Attach another cleat or ledger board across the whole length of your cabinet run if necessary.

When you’re ready to attach the first cabinet, carefully center it over the cleats or ledger boards and then screw it to the wall using a 2 1/2-inch drywall screw. Then, repeat the process with each of the other cabinets. Be sure to pre-drill each hole before attaching it to avoid splitting the face frame.

Be careful when installing cabinets, especially around gas or electric lines. Always wear proper protective gear, such as a dust mask and steel-toe shoes. Also, make sure to have a spot to set your tools and materials before you begin so that you don’t lose anything or get dirty. With accurate measurements, careful positioning, and secure mounting techniques, cabinets can be an easy DIY project for any homeowner.

Filler Strips

Cabinet filler strips are used to conceal gaps between the wall and cabinets. They can be found in the form of wood blocks, ready for paint, or primed and painted at most home improvement stores. You can also find them online and they are an essential tool for any homeowner, builder, or remodeler to have.

Before you start installing cabinets, it’s important to properly lay out the cabinet layout. The layout does not refer to the general arrangement of the cabinets as they will appear on the finished walls, it’s a fine-tuning process that ties together vertical and horizontal planes so that the cabinets can hang square, plumb, and level. It also helps to determine if there is any existing in-the-wall or through-wall piping, venting, plumbing, or electrical that will impact the cabinet installation.

The first step is to locate and mark every stud location on the wall using a stud finder. This will allow you to easily place the cabinets and avoid screwing into any obstacles in the future.

Once you’ve marked all the studs, it’s time to measure and mark where you want the cabinet wall and floor to meet. This will help you know how long to cut your filler strip and what size to make it. You should use a miter saw to cut the strip a little wider than the largest measurement you made earlier and then sand it with a belt sander until it is flush with the cabinet frame.

When you are ready to install the cabinet, clamp the strip in place and drill pilot holes into the wall and partway into the strip using wood screws. You should countersink the screw heads so that they don’t protrude from the cabinet face when you are finished.

Before you start installing your cabinets, it’s a good idea to test all the hardware on a piece of scrap material or a board in your shop. This will save you a lot of frustration down the road when you’re trying to put together an entire kitchen on-site. If you’re unsure about how to install an item, ask your local cabinet retailer for guidance before you get started.

The Basics of Basement Remodeling

Basement Remodeling

A basement remodel starts with cleaning out the existing mess and finding a temporary home for everything. Next comes putting up framing and drywall, which requires precise measurements and a good mask for breathing in drywall dust.Basement Remodeling

Smart storage options like a mud room, craft space, and a home office help make the most of the new basement. Finishing touches include flooring and lighting. Click https://www.tacomakitchenremodel.com/ for more information.

The cost of a basement remodel depends on the type of work you need. At the low end, converting a bare concrete basement into a simple rec room with vinyl flooring may run as little as $4,000. On the high end, renovating to add a kitchen and bedroom may cost $80,000 or more.

Framing, plumbing and electrical costs are usually the biggest expenses for a basement finish. In many areas, contractors charge between $50 and $100 per hour, plus materials and supplies. Some jobs, such as installing a laundry room or bathroom, require special skills and are more expensive than others. You can reduce basement remodeling costs by choosing less expensive hardware, fabrics and furnishings.

If your basement is damp or has water damage, professional mold remediation and drywall repair can increase the cost of your renovation by a significant amount. You may also need to replace insulation and rewire your entire basement, which can add up to more than $10,000.

If you are a skilled DIYer, some parts of a basement finish, such as painting and tiling, can be saved by tackling the work yourself. However, it’s best to have a contractor oversee the project and ensure all work is up to code. They’ll also handle pulling any required permits and ensure your renovation is safe. They can also help you find affordable materials and appliances.

Design

Basement remodeling is a great way to add extra living space to your home and increase its value. You can turn your basement into a bedroom, kitchen, home theater, office, or playroom for the kids. It’s also a more affordable option than adding an attic to your home.

One of the most important things to consider when designing your basement is the layout. You’ll need to plan your layout so that you can easily access electrical outlets, plumbing, and HVAC systems. This will help you avoid costly mistakes and delays later on.

Another important consideration is the flooring. Since basements typically lack natural light, you’ll want to choose a floor covering that reflects sunlight and brightens the space. Vinyl planks, for example, offer the look of hardwood floors at a lower cost. For a more modern style, you can opt for concrete or ceramic tile floors.

Depending on your needs, you might want to add a bathroom to your basement remodel. This will add value to your home and make it more comfortable for guests. Adding a bathroom is a big job, but it’s worth the investment.

If you’re planning to use your basement as a living room, game room, or gym, it’s important to separate the different areas. You can do this by using room dividers or tall furniture. You can also use screens or accordion doors to provide transitions between spaces.

Demolition

Basement remodeling is a complex project that requires a significant amount of time and energy. However, the investment can pay off in resale value and increased family living space. According to Remodeling Magazine, homeowners can recoup 70 percent of the costs when they sell their house.

The first step in a basement remodel is removing all the old stuff. This can include drywall, flooring and any existing furniture or appliances. You may also need to remove any ductwork, wiring and plumbing that is still in place. You will also need to make sure that the basement is dry and free of mold before you start remodeling.

You will need to insulate the walls before you start framing, but it is better to do this before putting up the drywall. Insulation helps the basement stay warm in the winter and cool in the summer. It also reduces noise and lowers utility bills. There are several types of insulation to choose from, including spray foam, foam board and fiberglass.

Once you have removed all the old stuff, you will need to start with a clean slate. This may mean tearing down some walls or simply ripping up 1970s green shag carpet. You will need to rent a large garbage bin for the trash, and you may want to check with your local sanitation department to see what items can and cannot go in regular trash.

Additions

If your basement has plenty of room and you want to make it into a living space, consider adding rooms like a bedroom, home office, or bathroom. These additions will add value to your home and help you enjoy the space more fully. You can also use creative transitions to separate different areas of the basement, such as barn doors and archways.

If you have a lot of family and friends who love to hang out in your house, turn the basement into a party room with a bar. This way, you can serve drinks and appetizers while watching sports on TV or hanging out with your family. You can also turn the basement into a home gym to stay healthy and active.

Basements are often cold and dark, but they can be transformed into a warm and inviting place for socializing. This is a great way to get the most out of your home and give it more livable square footage without the cost of building an extension.

Constructing a new addition is more expensive than remodeling a basement, but it can be worth the investment if you are looking for a specific type of space or want to increase your home’s value. Adding an addition may require a permit from the city, so be sure to check with your local municipality before beginning construction. Also, remember that renovation projects can hit snags at any time. It is best to have a contingency fund on hand in case you run into trouble during the process.

Plumbing

In most homes, basements were never designed to be fully functional living spaces. As such, converting an existing space into a functional bathroom requires careful planning. The first step is determining what kind of work you need to have done. Depending on your needs, you may need to add an entire bathroom or simply replace the sink, toilet and shower. You also need to consider the number of people using the new space and what their needs will be.

One of the most important aspects of this stage is figuring out how to get your hot and cold water to the new bathroom. This involves tracing the route of your supply lines so they don’t run into any structure, like headers or beams. It is also necessary to add venting. Plumbing systems work sort of like a soda straw: if there isn’t enough ‘air behind the water’, it can choke and gurgle when flushed. The solution is to add a vent, typically a Studor vent, which allows air in but not sewer gas out.

If you plan on adding a basement bathroom, it is also necessary to install sewage plumbing. This is done by installing a basin or ‘crock’ below the basement floor. A sewage pump is installed in this crock and a pipe connects it to the existing sewer line, allowing sewage liquids and solids to be pumped up into the main line, where they can be sent to the septic tank or sewer system.

Electrical

Whether you’re turning your basement into a home theatre, suite, laundry room or playroom for the kids, it is important to have the right amount of outlets and light switches. You can work with a professional electrician to choose locations for receptacles, breakers, and switch boxes. This will ensure that there are enough outlets for all of your appliances, and it will prevent overloading.

Adding ground fault circuit interrupter (GFCI) outlets is also a good idea. These help to prevent electrocution by cutting off the power in the event of a short or overflow. You will need to install at least one GFCI outlet per living space in the basement.

In addition to receptacles and switches, you will need to add new recessed lighting, ceiling fans and other electrical fixtures. If you are planning a home office, you will need to have adequate task lighting.

If you are adding a home entertainment system, you will need to run wiring for the speakers. This can be a complicated task, and leaving it to a qualified professional is best.

Depending on the scope of your project, you may need to obtain a permit before beginning renovations. A permit will ensure that the work is done correctly and is safe for occupants. It’s usually necessary for any structural, architectural, or plumbing changes. These permits will be inspected by your local authorities before being issued.